FC Site Guide
Update Footer
A) Update Footer Links/Title
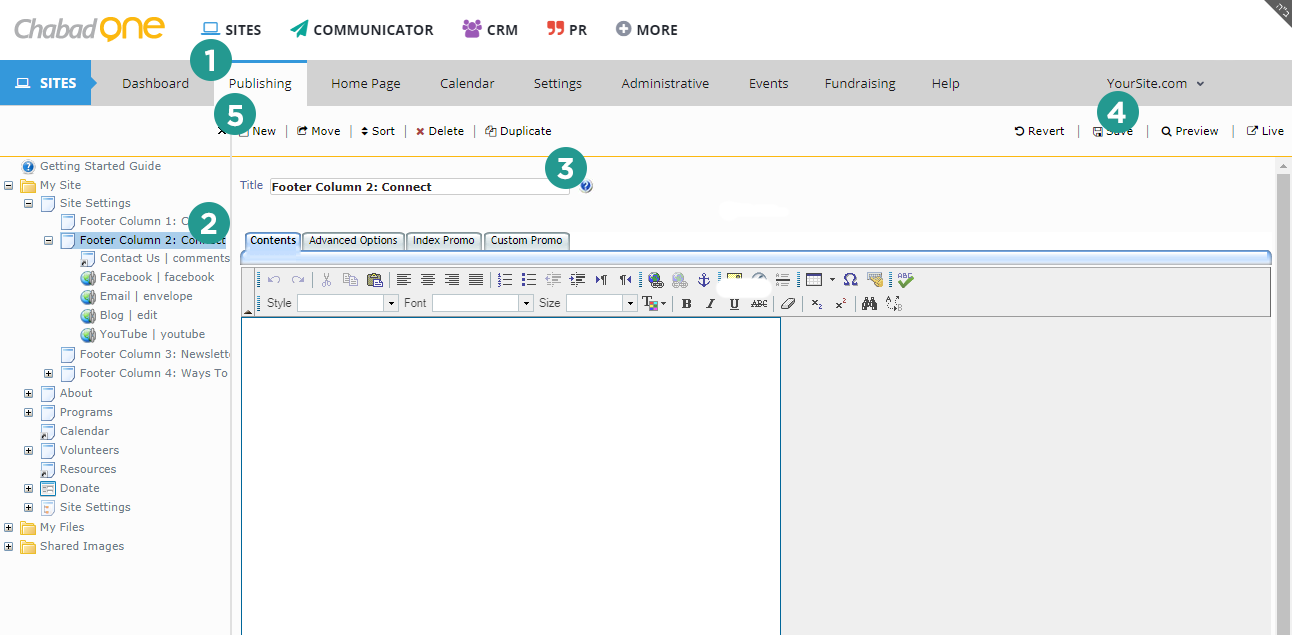
- Open the
Publishing tab - Under
My Site, select
Site Settings (the first page) and select a Footer column to edit (Each of the four footer columns
are a page under the Site Settings page) - Edit the
Title of the page to change the name of the Footer Column - Press

in the top right of the page - To create a new link under the footer column (this can be done for either the 2nd or 4th footer column) click
New > New Link (to add an icon, follow the instructions below)
Important: ensure the
Site Settings page remains the top page under my site to ensure the footer functions correctly.
B) Icons in the a Footer Column link
To use an icon in a footer column link, use the following naming format:
Name of Link | iconname
For example:
Email| envelope
A list of all available icons can be found on the
Font Awesome site. (Use the name that appears underneath each icon preview as the iconname)
C) Update Contact Info
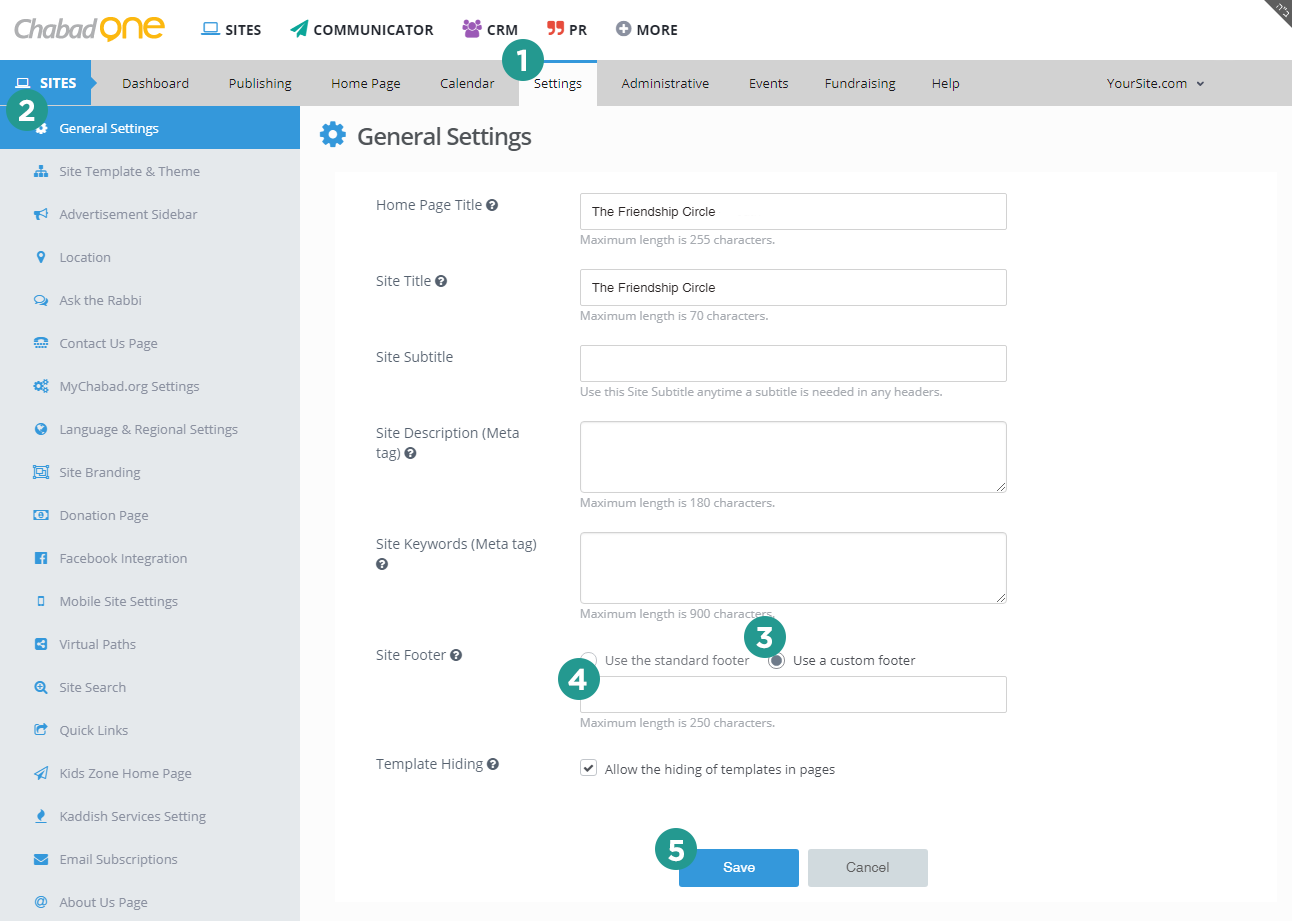
- Open the
Settings tab - Press
General Settings - Choose the
Use a custom footer option under
Site Footer - Enter the contact info in the box below
- Press
Save
Update Your Home Page
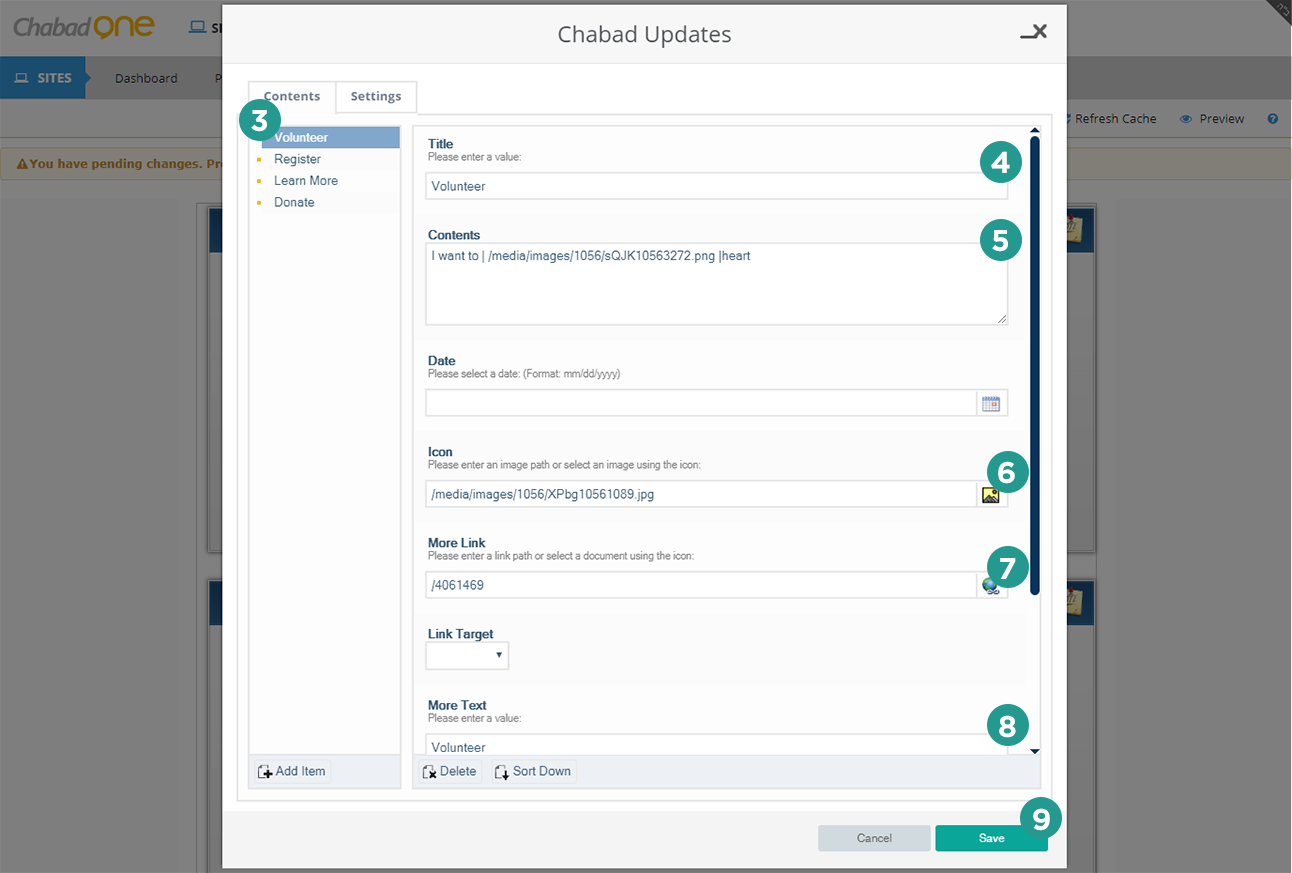
D) Update Event Slider
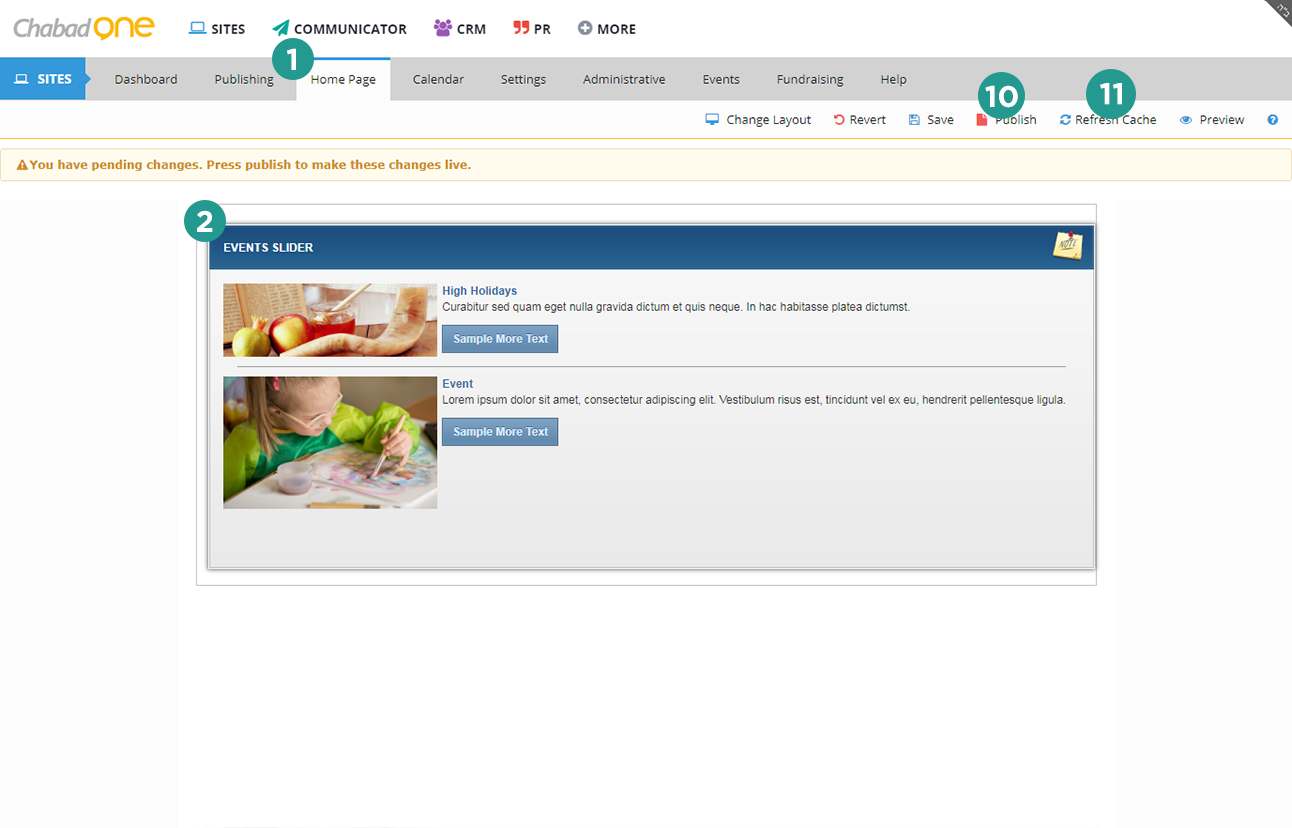
- Open the
Home Page tab - Click on the
Event Slider widget - Choose the event you want to edit
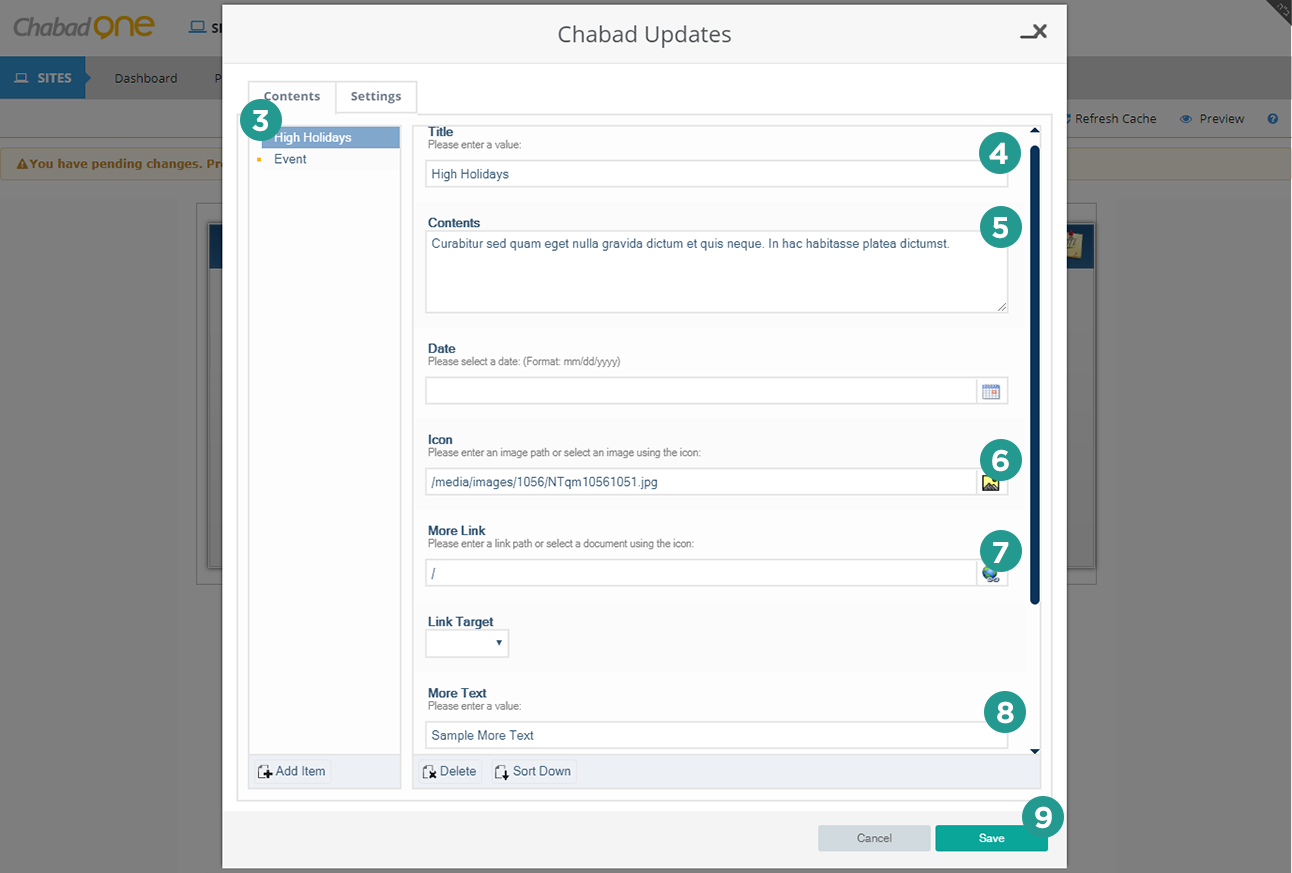
- Enter the
Title for the event - In
Contents enter a short description of the event - Choose an
Image to use for the event (Dimensions are 540 x 215) - Under
More Link enter/choose the page the event links to - Enter the text for the button on the event in
More Text - Save the event
- Publish your home page
- Refresh Cache of your site to see the changes
Tip: You can also add an expiry date for each event added
E) Update Mission Statement
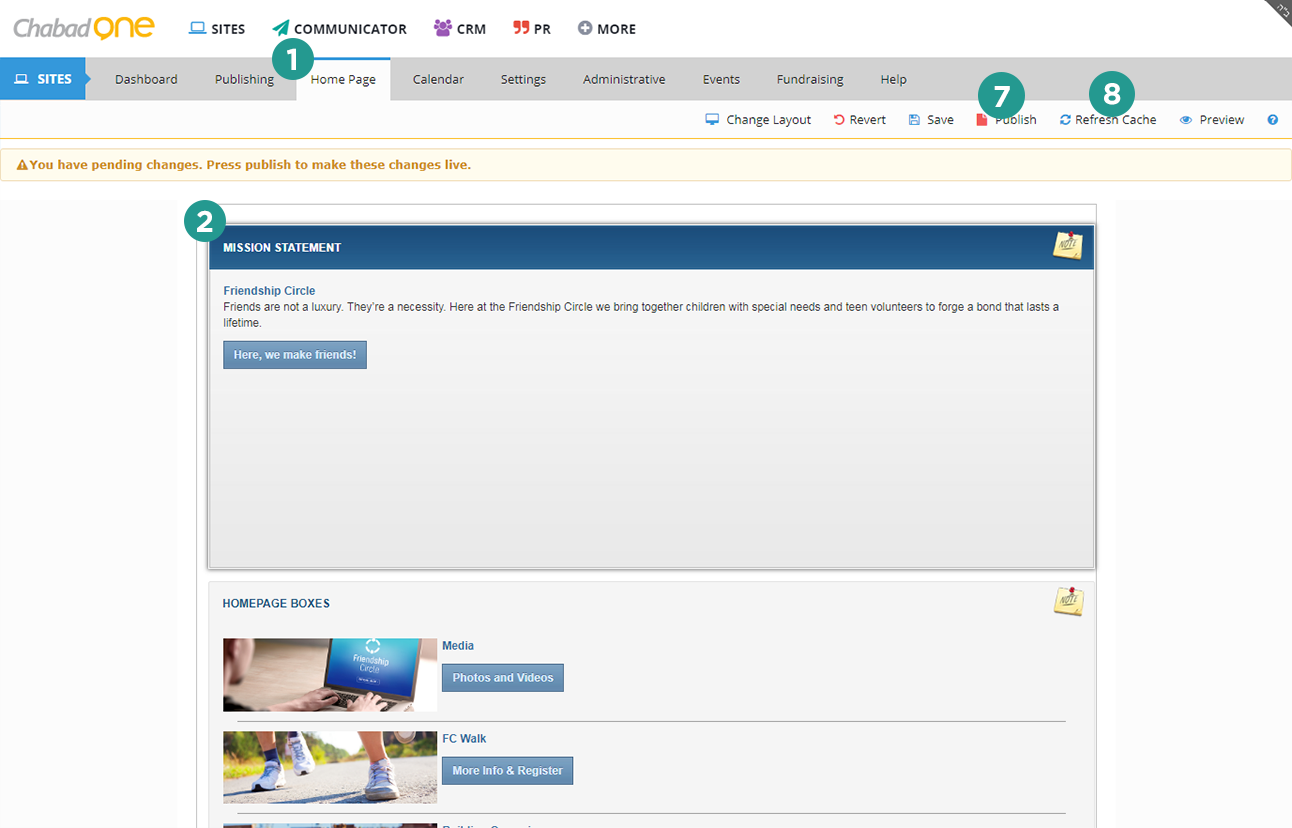
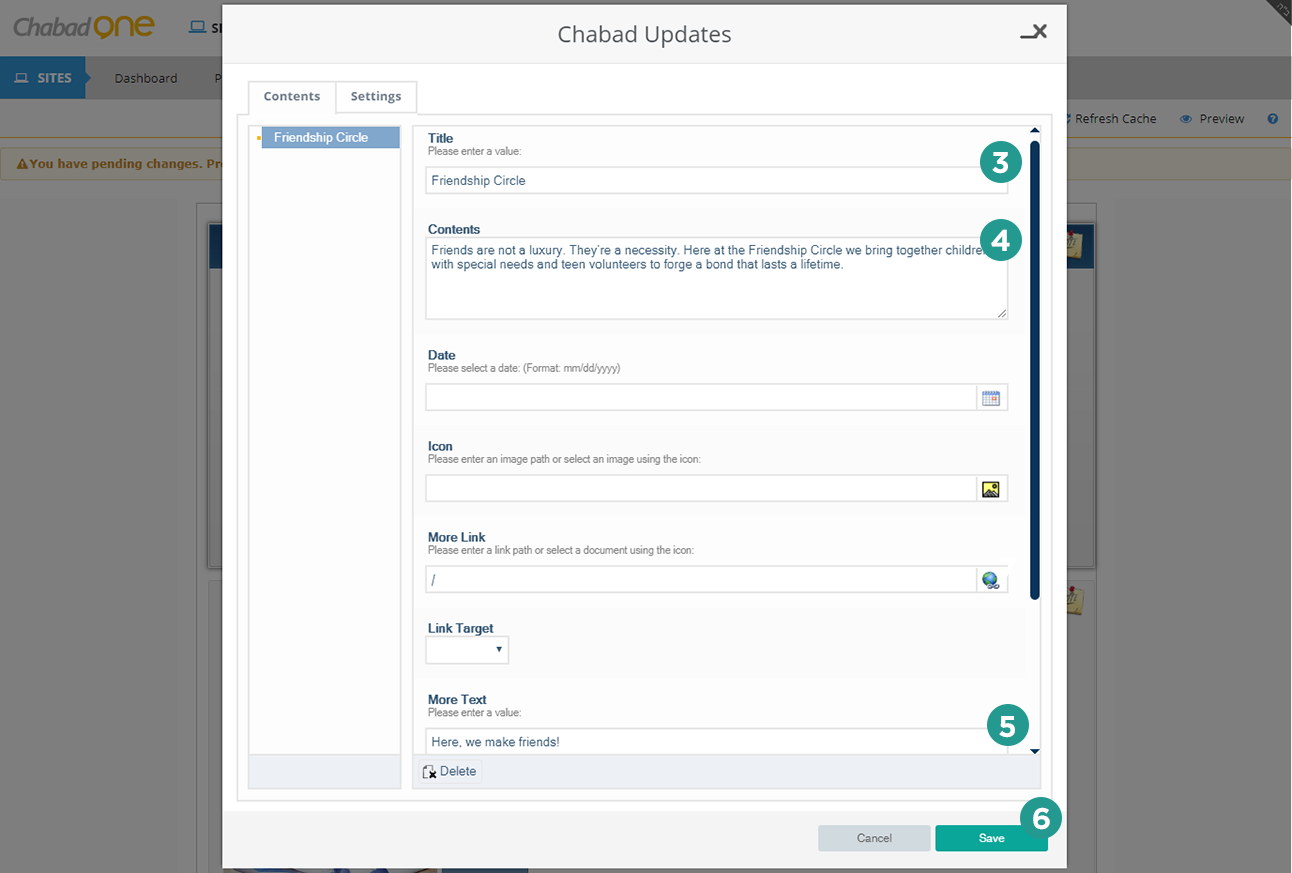
- Open the
Home Page tab - Click on the
Mission Statement widget - In
Title, enter the big text in the mission statement - In
Contents enter your mission statement - Enter the sub text in
More Text - Save the slide
- Publish your home page
- Refresh Cache of your site to see the changes
F) Update Mini Banners
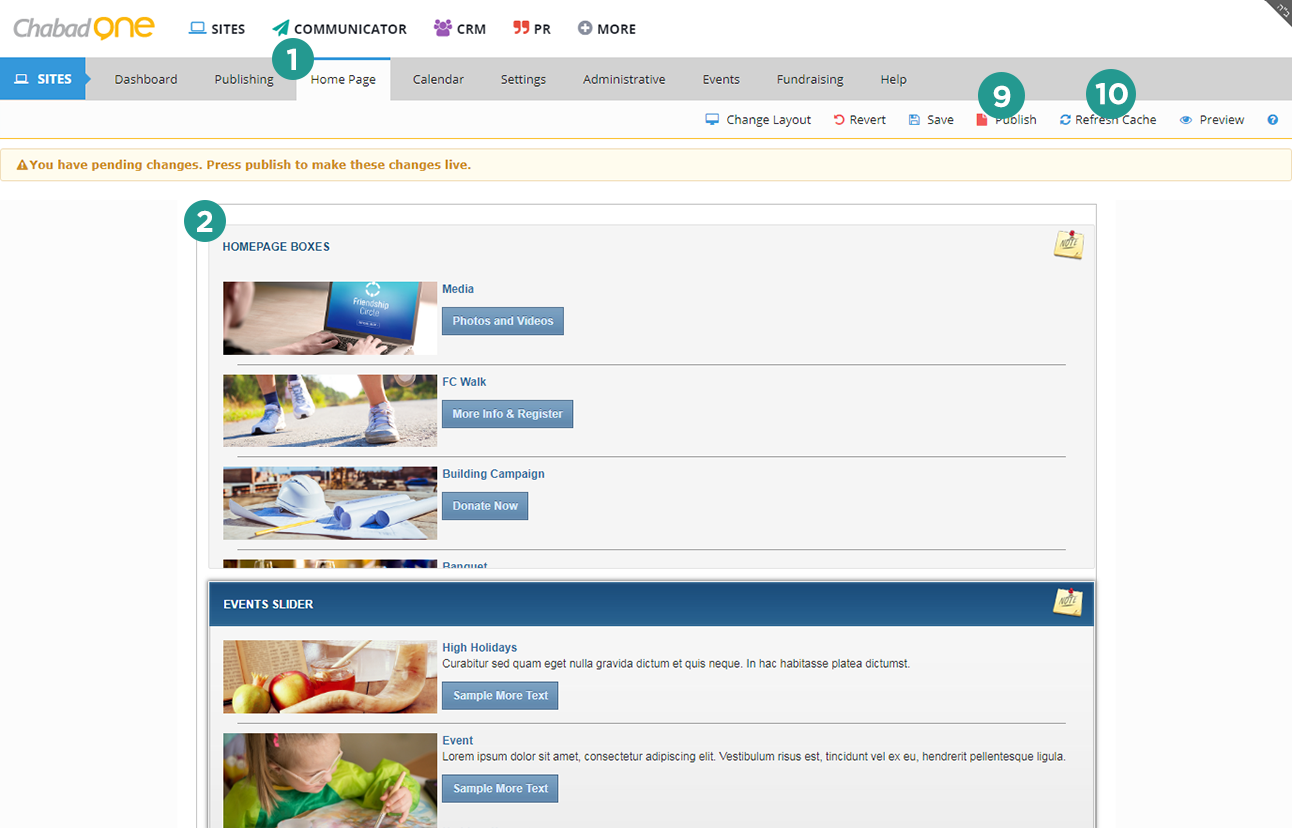
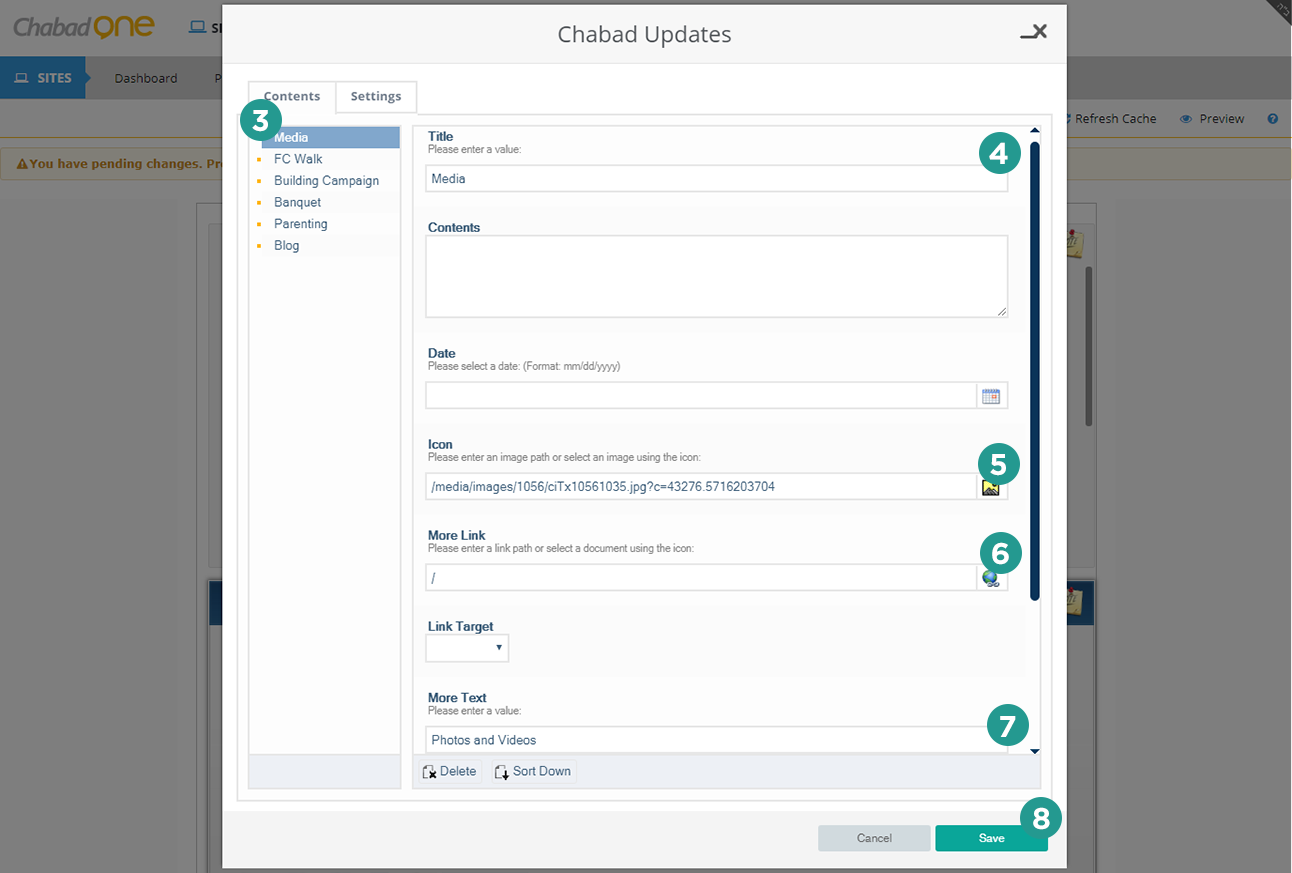
- Open the
Home Page tab - Click on the
Homepage Boxes widget - Choose the banner you want to edit
- Enter the
Title for the banner - Choose an image for the banner under
Image 1 - Under
More Link enter/choose the page the banner links to - Enter the text for the banner under
More Text - Save the slide
- Publish your home page
- Refresh Cache of your site to see the changes
1) The default stock banners are available in your site’s My Images folder under FC Site Template or view a list of all available banners.
G) Update Main Slider Links
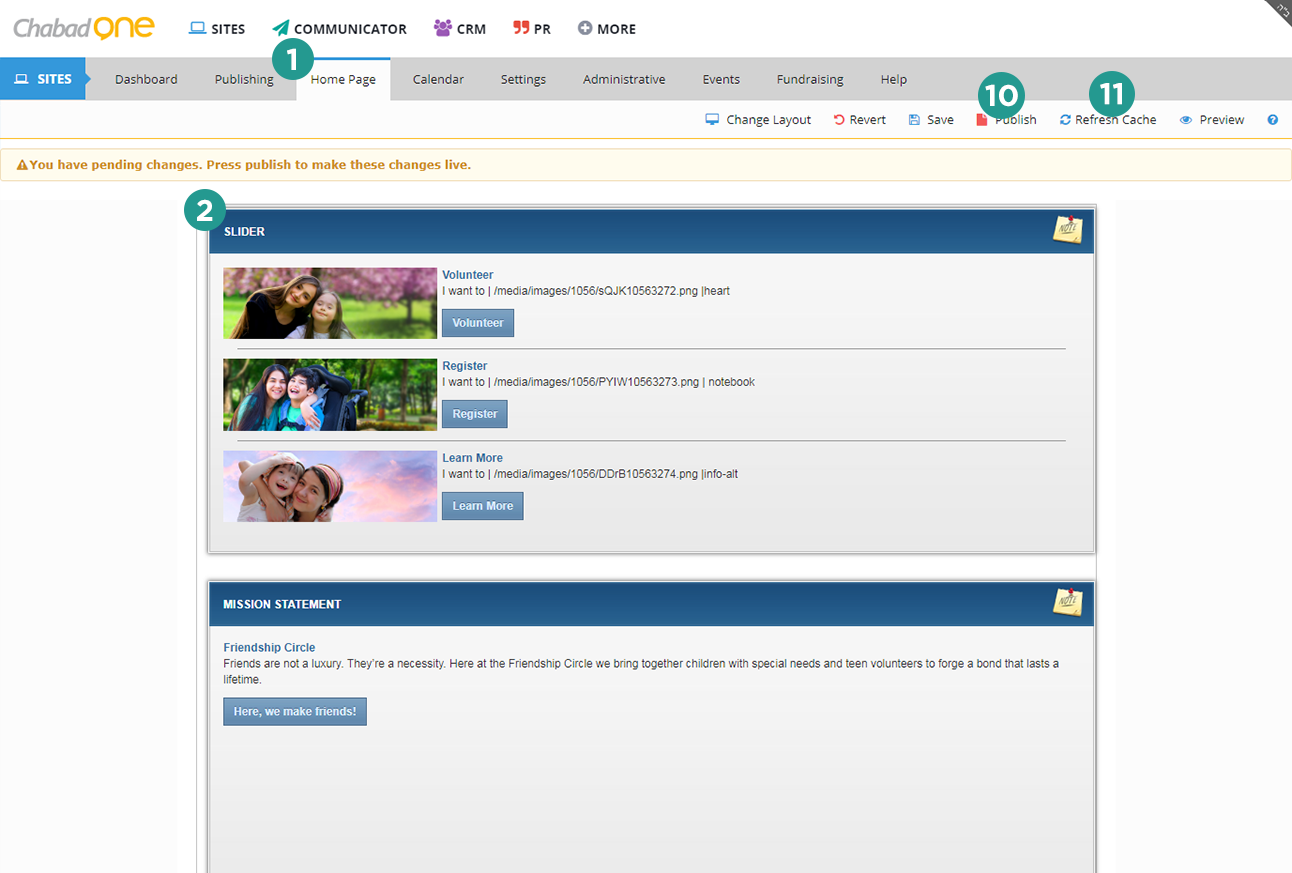
- Open the
Home Page tab - Click on the
Slider widget - Choose the slide you want to edit
- Enter the
Title for the slide - In
Contents use the following format to set the slider settings:
Small Icon Text
 1 | Foreground Image
 2 | Icon
 3
- Choose a background image for the slide under
Image - Under
More Link enter/choose the page the slider links to - Enter the text for the button on the slider in
More Text - Save the slide
- Publish your home page
- Refresh Cache of your site to see the changes
1) The small text in each icon
2) Upload an image in My Images and place the link here (for best results remove the site url from the image
src)
3) Choose an icon from the
LivIcons set
Update Inside Pages
H) Update Inside Page Header
To override the header image used on any page on a per page basis:
- Upload the images under
My Images - Open the page you want to update the header image on
- Click on the
HTML tab - Paste the following on the bottom of the page (replacing [IMAGE] with the image url you uploaded):
<img src="[IMAGE]" id="HeaderImage" width="100" alt=""> - Click on the
Design tab - Save the page